Icon description
Dungeon Doom is the most difficult, meanest and deadly dungeon in Ultima V. It also is a huge maze, which only makes things worse. Therefore here is a detailed solution how to survive this hell-hole and bring the quest to a good end. Before you even enter Doom, you need to have all the crown jewels plus the Sandalwood Box and all the Shadowlords must be destroyed.
Thanks to Paulon Dragon and Trigon Dragon for the maps.
Level 1[]
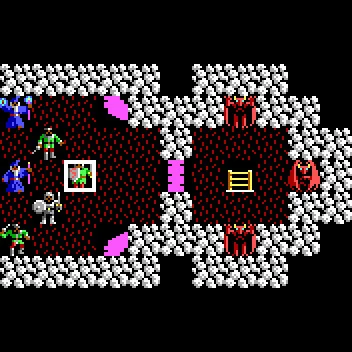
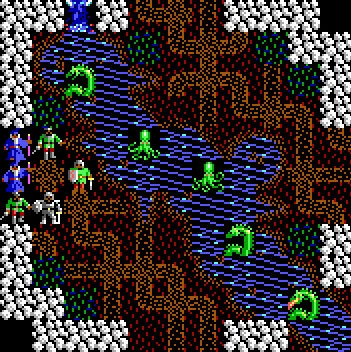
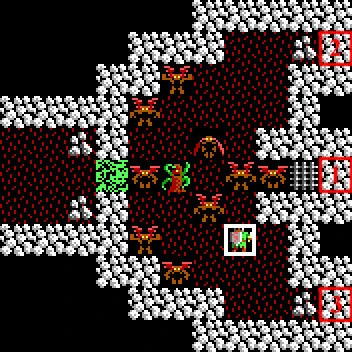
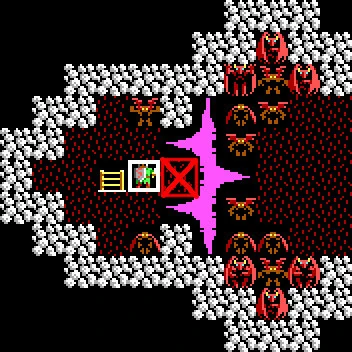
Room 1
The dungeon right begins in Room 1. The room is surrounded with ethereal walls that can only be dispelled by the Sceptre of Lord British. The room has no exit ladder, so the only way to actually exit Doom is by casting Gate Travel.
Should the Shadowlords be still alive, they wait here to steal the sceptre -thus making escape impossible- before killing the party (They always come back at once in this evil place).
Every direction is the right one, but for this guide, dispel the walls on the west then follow the path to the ladder down, descending to the next lower level.
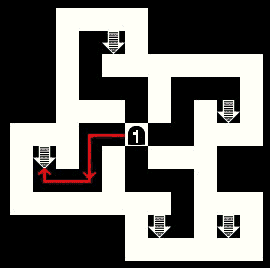
Level 2[]
The up-and-down ladder in the middle might look tempting, but it is a trap leading to nothing more than trouble -rooms full of enemies to be exact. All of the ladders that only lead down are safe and it is your choice which one to use to descend to the next lower level.
Level 3[]
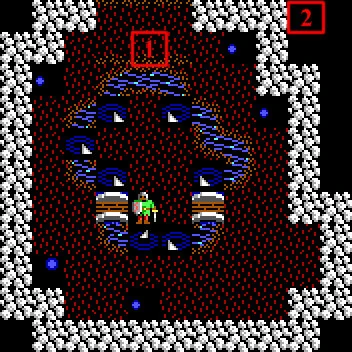
Room 2
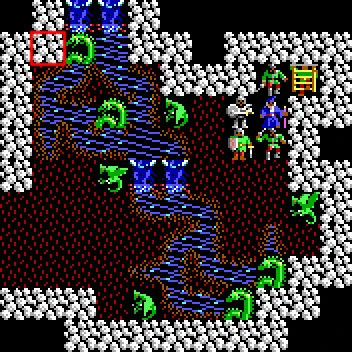
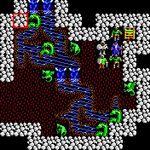
Search the eastern wall of the starting room on this level, to find a secret door. Following the corridor leads to Room 2. Three Daemons hide behind an ethereal wall and the time it takes to dispel it with the sceptre can spell doom on you since they can enspel you. 6 Wisps hide beyond the walls, so a character with a halberd would be helpful. Donning the Crown to negate their magic is critical to survive this room.
Be warned that removing the other two ethereal walls will reveal more Daemons to make your life difficult.
From now on, keep the crown on to protect yourself against your foe's magics, and descent down the ladder in the room to the next lower level.
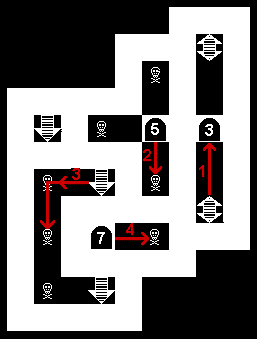
Level 4 and 5[]

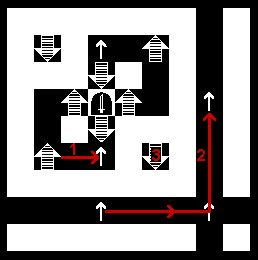
These two levels are interconnected in confusing ways, making it necessary to change between levels a few times.
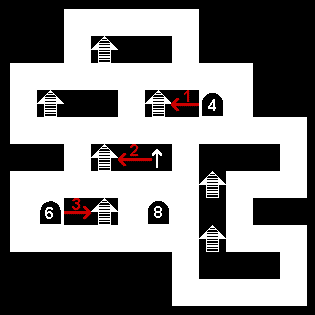
First coming from level 3, there is no choice, directly descent to level 5. On level five, follow path 1 to the east, and then climb up the pit with the Grapple to return to level 4. On level 4, follow path 2 to the south and climb down the first pit, then follow path 2 on level 5 first to the east, then to the north, and climb up the pit back to level 4.
Back on level 4, follow path 3 first east and then north, and then search to the east to reveal a hidden pit. Descend it and you reach the ladder down to level 6.
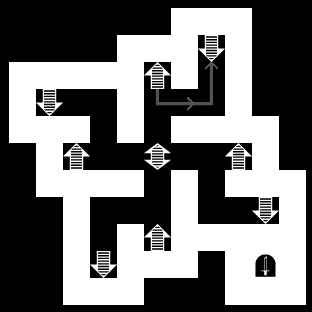
Level 6[]
Fighting Room
This level is simple and straight forward.
Follow the corridor until you reach the Fighting Room, in which you are greeted by numerous Kraken and Sea Serpents. After you've gotten rid of your foes, follow the path to the south to reach the ladder to level 7.
Level 7 and 8[]
Room 3
Room 4
Room 5
Room 6
Room 7
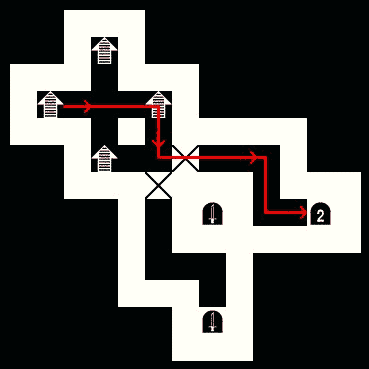
These two levels are the last and biggest puzzle in Dungeon Doom.
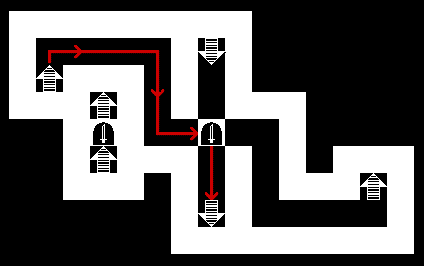
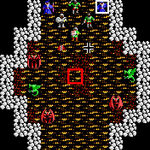
Once you have reached level 7, do not descent further, as it is a dead end. Instead, go north to enter Room 3. The room is full of Dragons, Daemons. Wisps, and Sand Traps. The sand trap in the middle is concealing the ladder down (marked on room shot).
The ladder directly leads to Room 4. Contrary to popular belief, it is possible to leave room 3 after clearing it, resting, and coming back to go down to room 4. In Room 3, one must remove the Crown after defeating the dragons and daemons to reveal wisps. Be careful, as they will possess your party should you remove the crown for too long. Easy way around this - send all but your strongest player out, and then remove the Crown until a Wisp appears. Put the Crown back on, kill the Wisp, and repeat. There are 6 Wisps total. If you want to take a chance, wait for 4+ Wisps to appear on the screen, then cast In Vas Grav Corp to take them all out at once.
Room 4 is filled with Sea Serpents and Dragons. Kill as many as possible before shooting the NW wall (marked on shot) to create the bridge. However, this creates more nasties and a never ending swarm of Mongbats, so better flee the room with your Avatar first. As long as you can Resurrect your dead (the Avatar should be level 8) it is no big thing. Alternatively, if one of your players is carrying a Halberd, then you can safely take them all out before activating the bridge.
Now on level 8, follow the corridor and the ladder leads directly into Room 5. The Poison Field will vanish after some time, but that path is a trap. Instead after killing your foes (Mongbats and Reapers), push the eastern walls as shown on the screenshot of the room and leave south. On the corridor, search south to reveal a concealed pit. Climb it down to reach level 8, and directly go up the ladder you see back to level 7.
Carefully search the corridor on path three. The first hidden pit is a decoy. After turning south you find another hidden pit which is the right way. Descending it drops you directly into Room 6. The first important thing is to kill all the Sharks and Wisps. After that is done, do not use the northern passage, as it is a trap. Instead first stay on tile 1(screenshot), which opens a small alcove where you push the wall marked 2, to open the eastern exit.
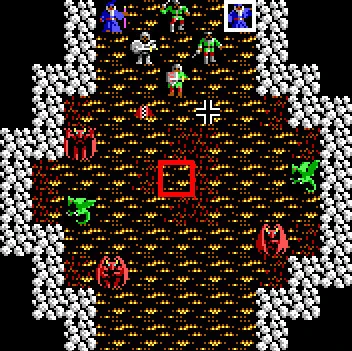
Leaving the room, the ladder back up is directly in front of you. It leads directly into Room 7.
This is the final battle and your foes have thrown everything against you to stop you from succeeding. After destroying the Mongbats on your side, do not dare to enter the square marked on the screenshot. It would trigger a horrible trap that floods the room with lava, spelling your doom. Instead weave the sceptre at the right place to open the ethereal wall and destroy your foes with strong spells while they try to fit through the small opening. You could also use Negate Time scrolls here, but remember, using this scroll has the unfortunate side effect of "removing" the Crown, so be mindful to either use another scroll OR wear the Crown when time returns to normal. Casting An Xen Corp can weaken some Daemons, too.
After leaving the room to the east, search to the east to find the last hidden pit. Now is a good time to save the game, before descending this last pit to Lord British's prison, Room 8. Walk everyone in front of the mirror and then give Lord British his Sandalwood Box (say "yes," or the game will continue indefinitely - kinda fun to watch... once...) so that you can escape with the Orb of the Moons.